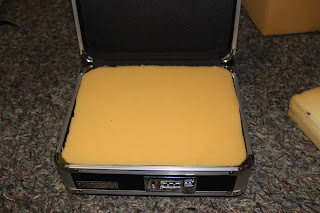
This is a tutorial on how to make a soft foam storage case for, specifically in this case an external hard drive. You could use this to make one for your camera, microphone, or other electronic media/sound equipment.
I needed one because I have to be able to take this storage with me anywhere (school and back), and hard drives are sensitive to vibration, and can break easily if dropped. Even if no damaged occurs to the outside of the case, it can damage internal parts. Solids State Drives (SSD's) don't have this problem. But who has money for those?
Start by measuring your box you are going to insert the foam into. This box I purchased from an office store, which was originally a cash box, and I removed the money tray.
Here I started with some foam from a couch cushion. I recommend not pulling one off your nice couch though. These can be purchased from craft stores that sell fabric and things of that nature. Lucky for me, my grandma had one lying around she let me have. I went ahead and drew out on the foam the measurements from the box and cut out the foam.
If you use a utility blade, it cuts really easy. I highly recommend this for cutting it out.
Also using a straight edge to help you cut straight lines.
Measure the depth of the bottom of the box, and put measurement marks all they way around the foam.
In a spiral motion, continually cut around the foam.
See how your foam fits into your box. Make any adjustments if needed, trimming corners, or my box had a couple parts that jut into the foam, which I cut out (not pictured).
Then with remaining foam, do the same for the top of the box.
It will look something like this.
Then lay out your electronics, and figure out how much foam you'll need to remove.
It's hard to add or subtract small amounts of foam, so just get it right the first time. Ha ha. Good luck.
(If you line it with fabric like I do later, leave a little extra room)
First cut out an outline like this.
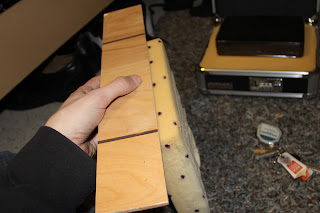
Use some flat pieces and some clamps to begin to cut laterally.
(if you want you can cut it in to two layers, cut out the center and re-glue the two pieces of foam back together. Make sure you use glue that can be used on foam TEST IT! Some glues will deteriorate foam.)
Here is what it will start to look like.
I used a razer and carefully cut out some odd mountainous regions... It won't be too noticeable later.
Starting to look good!
Now I cut out some pieces of scrap fabric slightly larger than my foam, and glued them over it.
I used Permatex Headliner and Carpet Adhesive, because it works on fabric, and foam.
I had to get a little creative cutting out shapes for the bottom, but I have confidence you can figure that out.
And here's the finished product! It looks great! Fit's Firm and protects my 2TB of data on this external Hard Drive!


No comments:
Post a Comment